Background
On Monday you wrote a tangled web of spaghetti code. Today, you’re going to reorganize the code without changing the functionality. That process, keeping outputs the same while cleaning the code, is called refactoring and it’s an essential step in creating, maintaining, and sharing workflows.
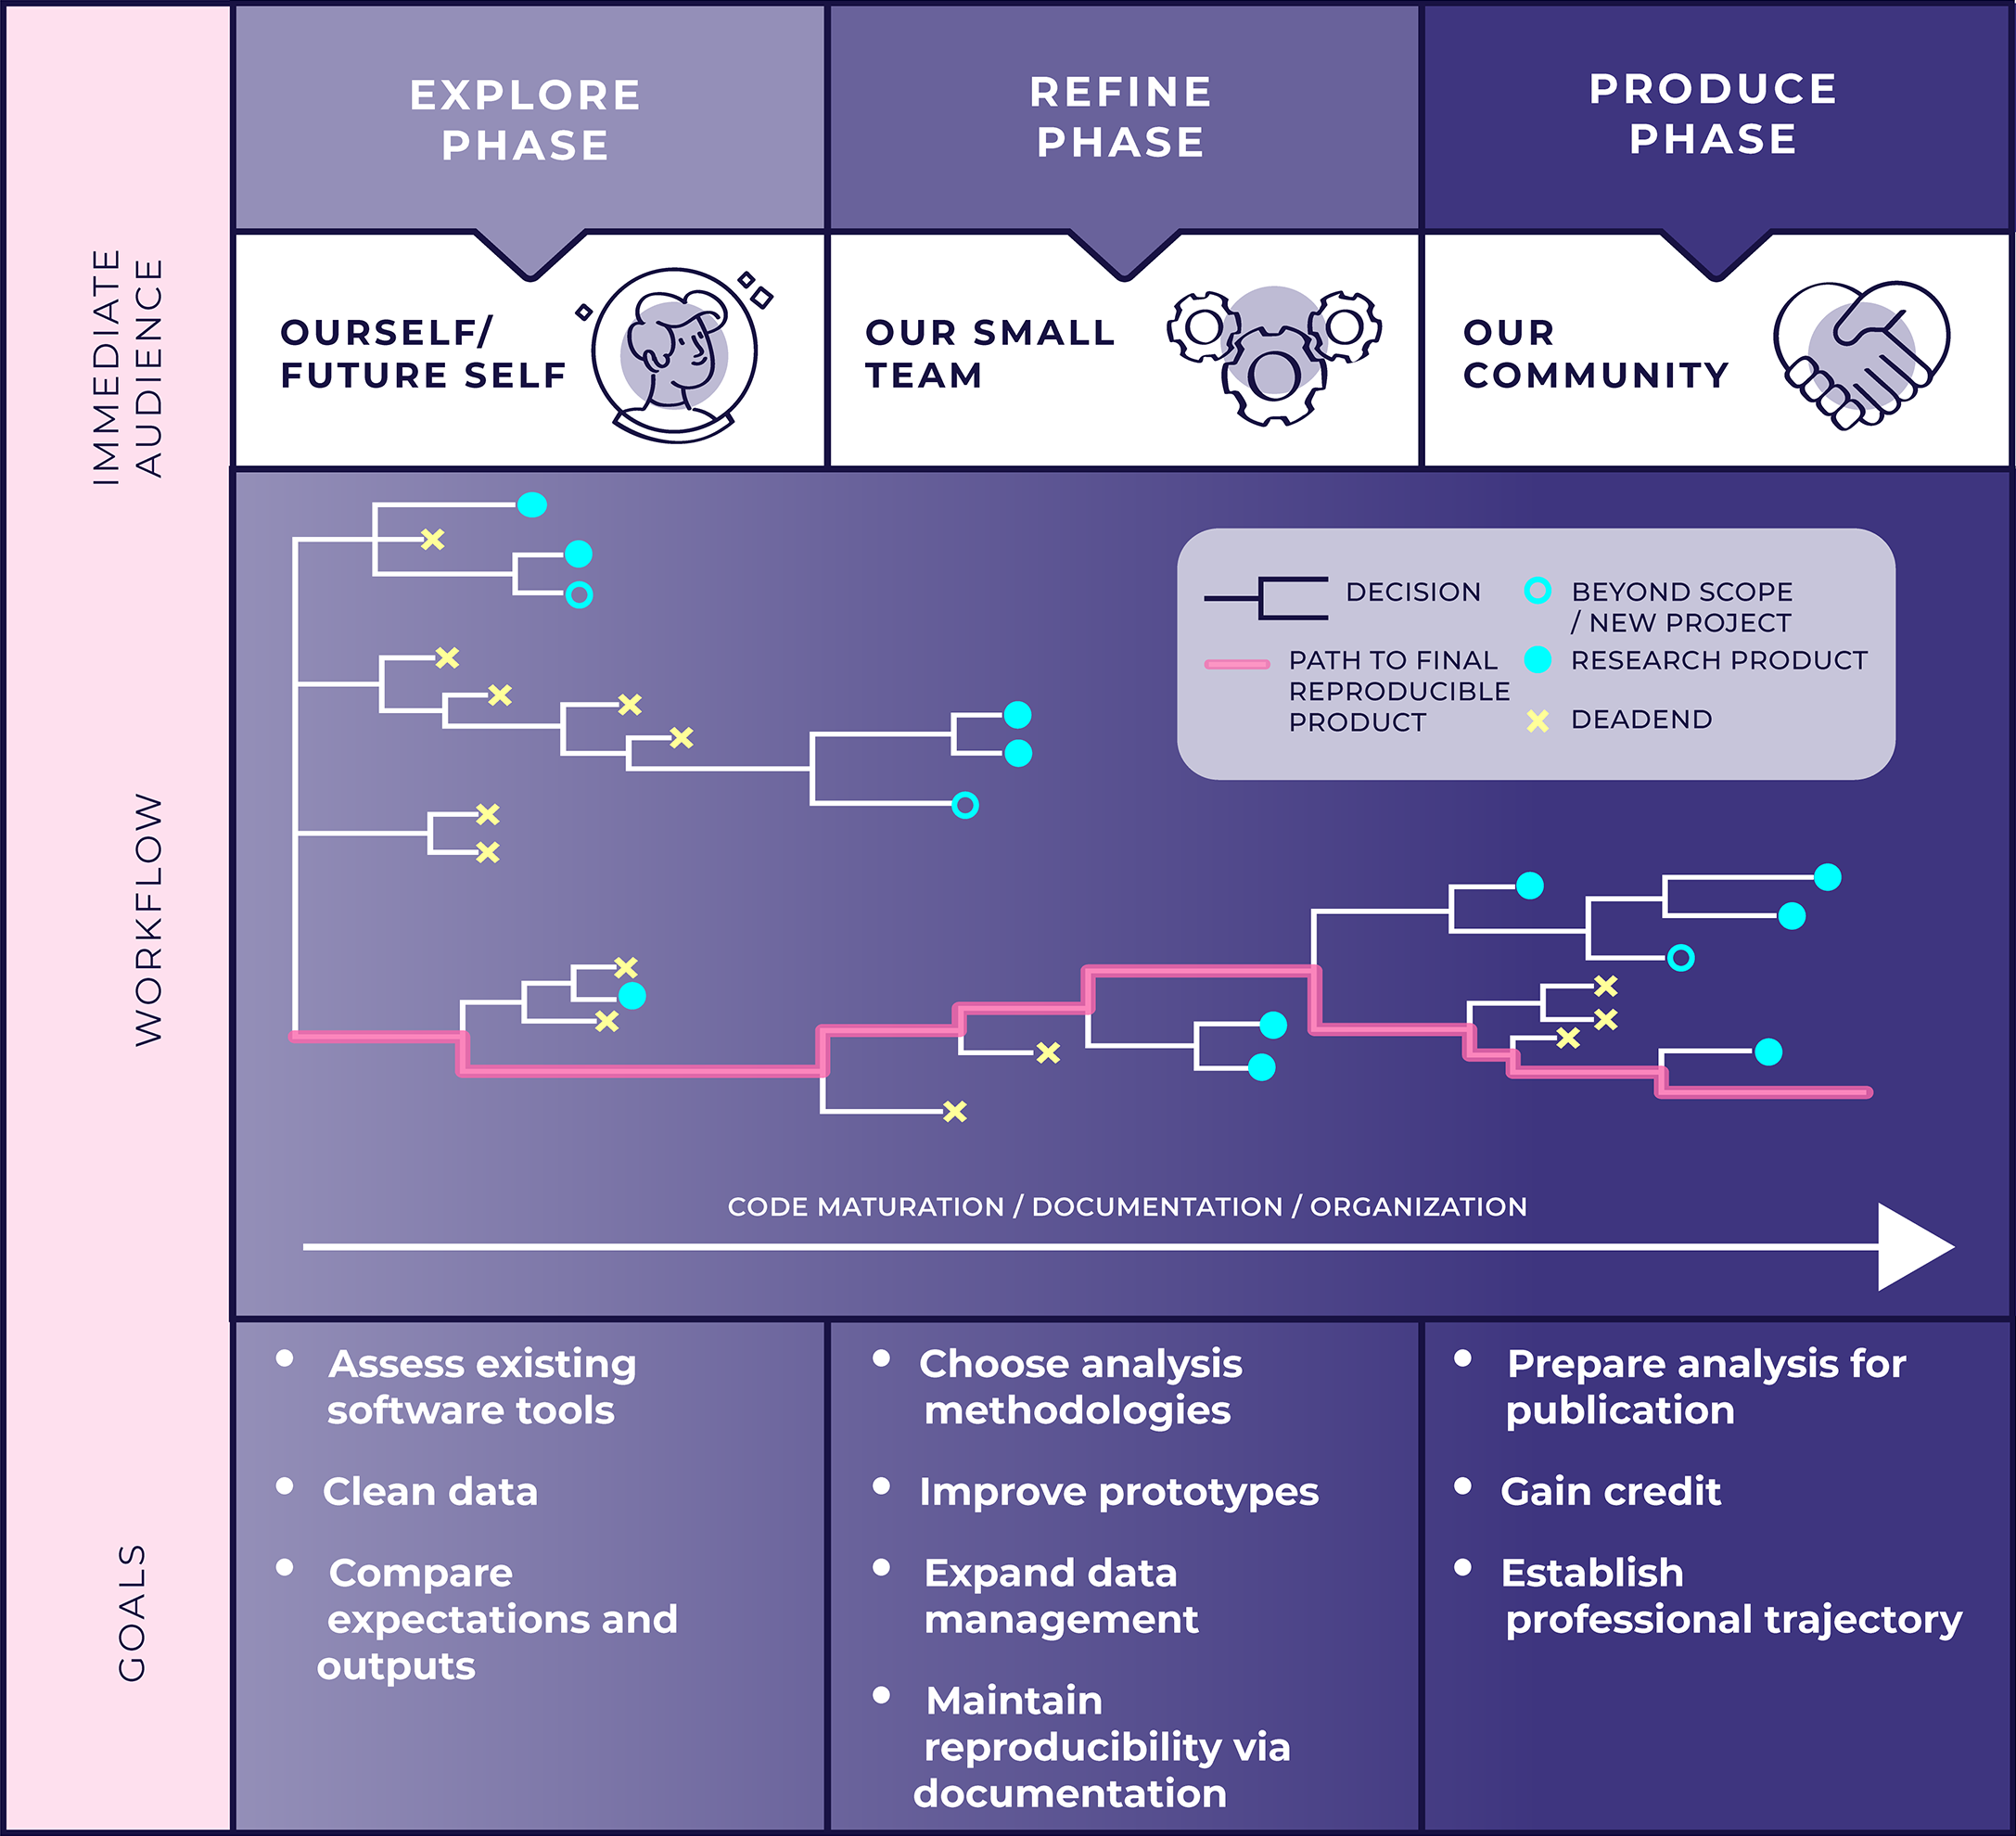
In most analyses, you won’t know exactly what you need to do fully in advance. Which means your initial implementation is going to be exploratory. Recall the figure below from Day 1 (Stoudt, Vásquez, and Martinez 2021). As you draft your code, you’ll hit dead ends or pivot to new solutions. These dead ends yield confusing code that’s hard to read and build upon. This problem is inevitable! Refactoring is the solution.
One good way to refactor your code is to write a function to perform a task. Writing a function provides several immediate benefits:
- The function name (if chosen wisely) describes the task clearly and succinctly, which several lines of code may not do.
- A function separates the internal logic of the task (the function body) from the purpose it serves in your analysis (a script). That helps you focus your attention on one at a time, instead of mentally juggling both.
- If you end up doing that task multiple times, you can reuse and maintain one function more easily than copy-paste-editing the same chunk multiple times (it’s also less error-prone).
Goals
In this session, you’re going to pick a task in your spaghetti code and refactor it into a function. As you do so, you’ll learn how to apply two GitHub project management tools we covered in lecture: Issues and Pull Requests.
Instructions
Identify and describe the task
It’s probably hard to pick out a task directly from spaghetti code. That’s why it’s called spaghetti! It’s probably easier to refer to your flowchart. Pick a task in your workflow and answer the following questions. Picking the right scope for a task is subjective, and you may need to revise your answers a couple times to find the right level of complexity to refactor.
Q1: What is the task? Plain language, 2-4 sentences.
Q2: What are the task’s inputs? What data and parameters do you need to know to do the task?
Q3: What is the task’s output? Be specific! If it’s a vector, what type (e.g., character or numeric) is it and how long is it? If it’s a data frame, what are the column names and what are their types? Are there constraints on what the output can be (e.g., sorted, range limits, etc)?
Q4: Which lines of code in your spaghetti currently perform the task?
Answer these questions in a GitHub Issue in your repo (instructions here). For Q4, you should directly link to the code snippet.
Write your function
In the FlukeAndFeather Workflow Organization System™️, functions go in scripts in the R/ directory. This is a common convention for organizing R projects.
Before proceeding, create a branch and switch to it.
Create a script in the R/ directory. Give it a name that describes your task.
Write a function to perform your task. Your answers from the previous section should guide you!
Your answer to Q1 should help you pick the function’s name.
Your answer to Q2 defines the function’s parameters.
Your answer to Q3 defines the function’s return value.
Your answer to Q4 is the starting point for the function body.
Here’s a simple function to refresh your memory for R function syntax.
add_nums <- function(num1, num2) {
  result <- num1 + num2
  return(result)
}Steps “Identify and describe the task” and “Write your function” probably will require some iteration. As you start writing your function, you may find it makes sense to redefine your task, add or remove a parameter, or reformat the output. That’s all part of the process!
Refactor your spaghetti
You’ve defined your function, now it’s time to use it.
- At the beginning of your analysis script (the spaghetti), use the
source()function to load your function. If your function is infoo.R, you’d writesource("R/foo.R"). - Replace the code you identified in Q4 with a call to your function.
- Run your analysis script and verify the results remain the same. This will probably require some debugging!
Commit your changes and create a pull request
Typically, pull requests occur between forked repos. But they can also be used between branches in the same remote repo. There are fewer moving parts when you stay in a single repo, so that’s what we’ll start with today. You’ll create a fork and pull request tomorrow during peer review.
- Commit your changes. In your commit message, say this commit addresses the Issue you created earlier. If you created Issue #1, your commit message should include “See #1”.
- Push your commit.
- Navigate to your repo on GitHub. Switch to the Pull requests tab. You should see a yellow notification that one of your branches had a recent push, and a green button saying Compare & pull request. Click on that green button (not New pull request).

You have the option to add a title and description. By default, your title will be the latest commit message. If you wrote something descriptive and succinct, you can keep it. The description should say what your pull request does. The issue you opened earlier should have most of the details, but if you learned something along the way that’s not in the issue then this is the place to include it.
Click on the green Create pull request button.
GitHub will notify you if there are any merge conflicts. Unless you edited your main branch separately, there shouldn’t be any. Click on the green Merge pull request button, then the green Confirm merge button. You should see a purple merge icon and a message saying it’s now safe to delete the branch you made.
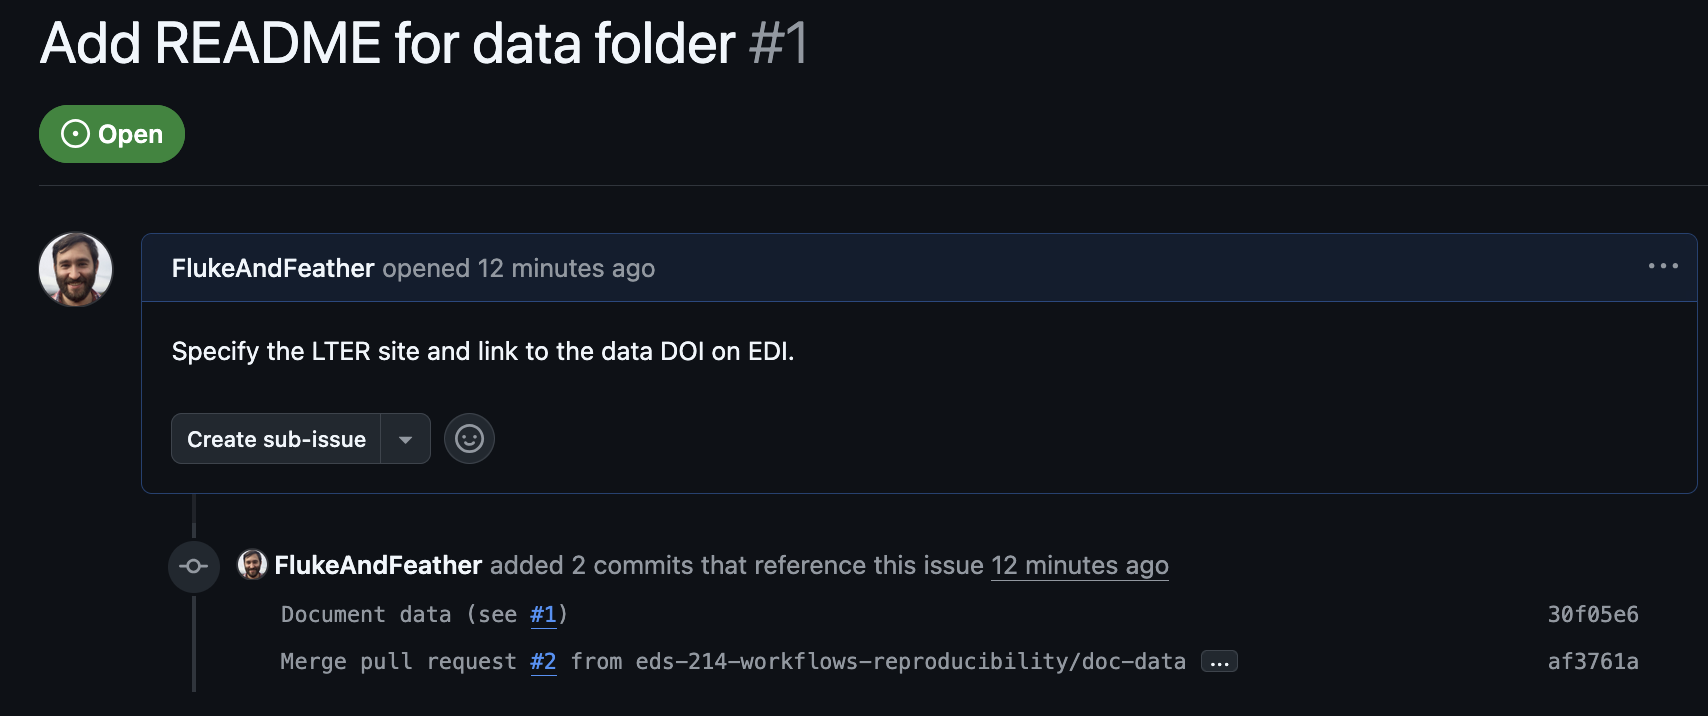
Switch back to the Issue you made earlier. You should now see 2 commits that reference the issue: the commit you made locally and the pull request itself. Close the issue by clicking the Close issue button with the purple check mark next to it.
Recap
In this session you used GitHub’s project management tools (Issues and Pull requests) to make improvements to your repo.
Issues are important for collaboration because:
The Issue describes the problem (e.g., what needs to be refactored).
Collaborators can discuss the solution in the Issue thread.
The discussion can directly link to the relevant lines of code.
You made an internal pull request in your own repo today, which familiarized you with the process. Tomorrow you’ll fork a partner’s repo and create an external pull request.